 WHAT’S NEW IN VERSION 170105?
NOTE: Version 170105 replaces version 161016.
1. ExLight is now based on Ubuntu 16.10 (alias Yakkety Yak) and Debian Jessie/Stretch.
2. I have upgraded the Desktop environment Enlightenment (Beauty at your fingertips) to version 0.20.99.0 (from 0.19.12).
3. I have replaced kernel 4.8.0-21-exton with my special kernel 4.9.0-11-exton corresponding Kernel.org’s stable kernel 4.9. If you want to use “my” kernel in another Ubuntu/Debian system you can download it.
4. ExLight’s ISO file is now a ISO-hybrid, which means that it can very easily be transferred (copied) to a USB pen drive. You can then even run ExLight from the USB stick and save all your system changes on the stick. I.e. you will enjoy persistence!
5. Another big improvement is that ExLight can run from RAM. Use Boot alternative 4 (load to RAM). When the system has booted up you can remove the disc (DVD) or USB stick. You’ll need at least 2 GB RAM to run ExLight that way.
6. The installation program Ubiquity (Ubuntu’s live installer) has been replaced with Refracta Installer. Very simple to use! A new user (your user) will be created during the installation process. The reason for the replacement is that Ubiquity is a bit too complicated and that the program crashes once in a while.
7. I have installed Nvidia’s proprietary graphics driver 375.26.
8. I have added seven animated wallpapers.
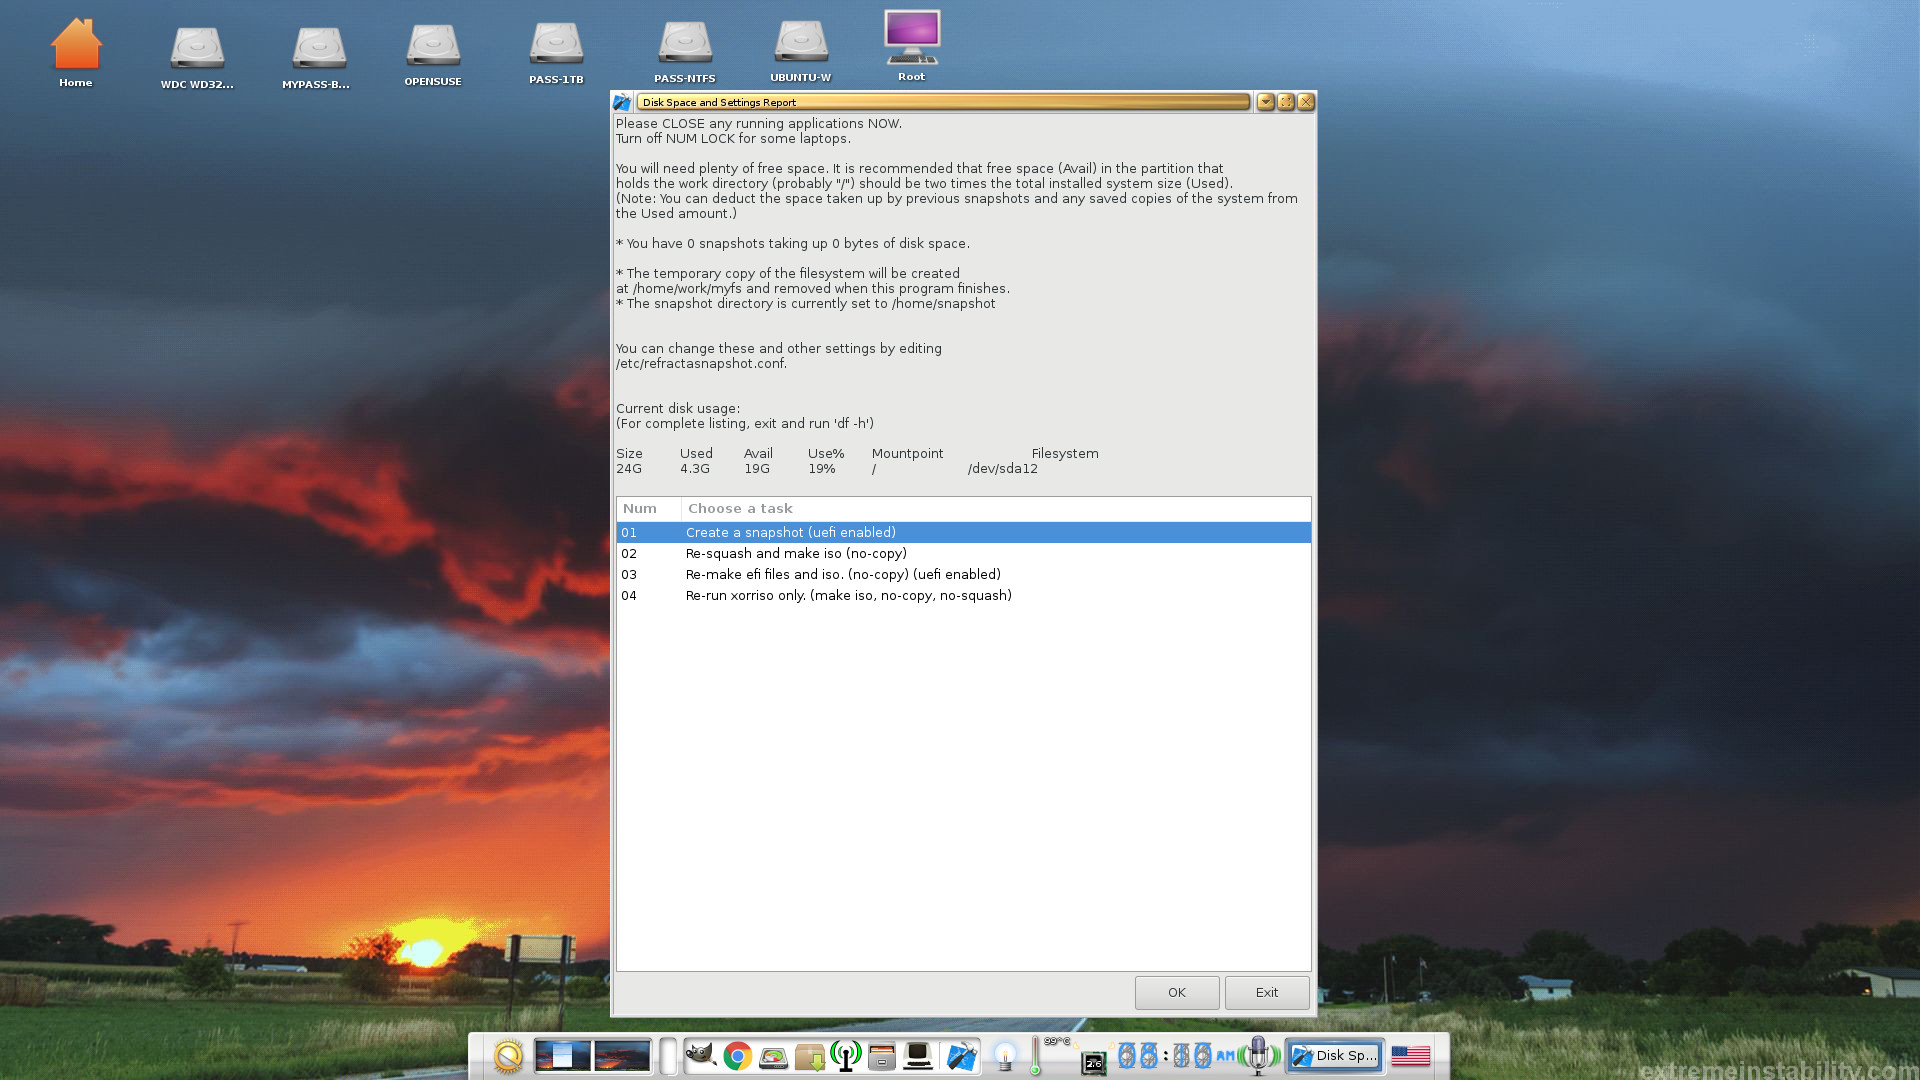
9. MOST IMPORTANT: I’ve added Refracta Snapshot, which make it possible for you to create your own live installable Ubuntu system. I mean change everything to your liking, fire up Refracta Snapshot and wait 3 – 5 min until your new ISO is ready!
What’s new in kernel 4.9?
![]() Installed packages
Installed packages
The Desktop Environment is Enlightenment 0.20.99.0 (Beauty at your fingertips). Kernel 4.9.0-11-exton is used. (Kernel.org‘s stable kernel 4.9). Program content: Refracta Tools, Libre Office, Synaptic, GParted, SMPlayer (an alternative to Vlc), Wicd, PCManFM, Google Chrome (for watching Netflix movies) and Gimp. Furthermore compilation tools so that you can install programs from source. I have also included Nvidia’s proprietary graphics driver 375.26. It has support for the following GPUs (among others): Quadro M3000 SE, GeForce 10, GeForce 900, GeForce 800A, GeForce 800M, GeForce 700, Quadro Series, GeForce GTX 970M and GeForce GTX 980M. Study the full ExLight program LIST. All packages have been updated to the latest available version as at January 5, 2017.
The system language is English.
Login to Enlightenment
When you start up from a dvd disc or a USB stick you will end up in Enlightenment logged in as the ordinary user exlight. You can log out to Slim‘s login screen and log in again as root if you want. The password for exlight is exlight. The password for root (superuser) is root. NOTE: It can happen that you – after the boot process is over – end up in console mode on certain computers. Then just log in as exlight or root and run the command startx. You will then (hopefully) enter the Enlightenment Desktop.
Using the Nvidia proprietary driver
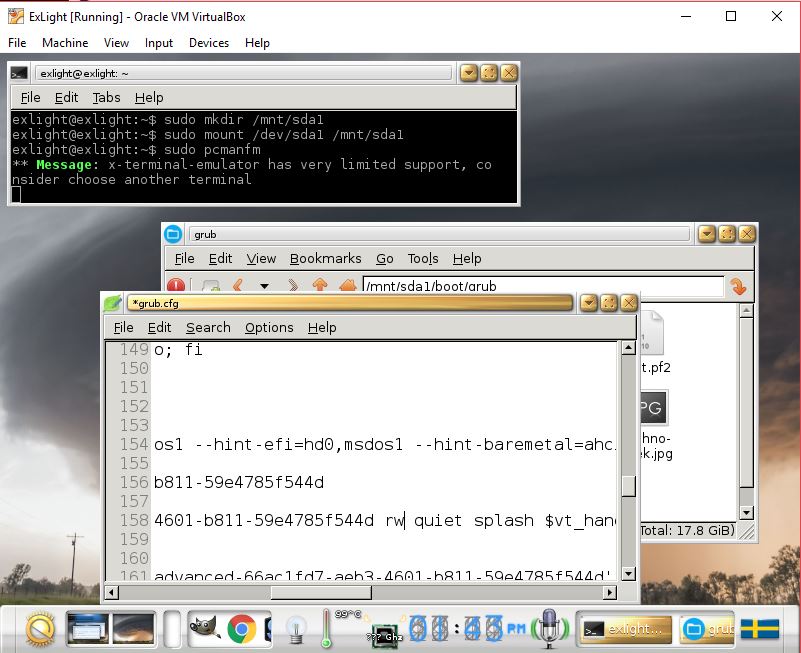
If you want (and can) use Nvidia’s proprietary graphics driver 375.26 you shall boot up ExLight using boot alternative 3 (Nomodeset). Then open up a terminal and run sudo nvidia-xconfig. Log out. If you can’t reach X/Enlightenment then your card isn’t supported. Delete xorg.conf with sudo rm /etc/X11/xorg.conf and run the command startx. Or reboot your computer. After a hard drive installation of ExLight the open source driver Nouveau will be used, since it’s “built in” in the kernel. If you want and can use Nvidia’s proprietary graphics driver 375.26 you’ll have to run the command sudo nvidia-xconfig and restart your computer. You’ll also have to change /boot/grub/grub.cfg as this example shows.
menuentry ‘ExLight :: GRUB :: (sda8)’ –class ubuntu –class gnu-linux –class gnu –class os $menuentry_id_option ‘gnulinux-simple-e150990b-5ae8-4f35-8d71-8118e682b5c7’ {
insmod gzio
insmod part_gpt
insmod ext2
set root=’hd0,gpt8′
if [ x$feature_platform_search_hint = xy ]; then
search –no-floppy –fs-uuid –set=root –hint-bios=hd0,gpt8 –hint-efi=hd0,gpt8 –hint-baremetal=ahci0,gpt8 e150990b-5ae8-4f35-8d71-8118e682b5c7
else
search –no-floppy –fs-uuid –set=root e150990b-5ae8-4f35-8d71-8118e682b5c7
fi
linux /boot/vmlinuz-4.9.0-11-exton root=UUID=e150990b-5ae8-4f35-8d71-8118e682b5c7 rw nomodeset
initrd /boot/initrd.img-4.9.0-11-exton
}
Wireless connections
In version 170105 I have replaced NetworkManager with Wicd to make it easier to configure wireless connections. Now just start up Wicd-client. Give your WEP/WAP password and connect. That’s it! Maybe you will have to change your network interfaces (eth0, wlan0) to for example eth1 and wlan1 in Wicd’s Preferences and click on the button Refresh before you can connect. Check your interfaces with the command sudo iwconfig.
IMPORTANT ABOUT REFRACTA TOOLS
Refracta tools are pre-installed in ExLight Build 170105. Use them to create your own live installable Ubuntu system. I mean create your own installable Ubuntu 16.10 Live DVD once you have installed ExLight to hard drive. I mean change everything and then create a whole new Ubuntu live system. Start Refracta from Menu >> System >> Refracta Snapshot. You don’t even have to install ExLight to hard drive before you can use the Refracta tools. If you have plenty of RAM you can create a new (your own!) Ubuntu system while running ExLight from DVD or a USB stick. Please note that the whole Refracta process (creating your new ISO) will only take 5 – 10 min! You’ll find the ISO in /home/snapshots. The whole thing is very simple. Refracta Installer replaces Ubiquity (Ubuntu’s installer). Refracta Installer is also very simple to use. No “expert knowledge” is needed.
Installation to hard drive
Note that you in advance (just in case) should create a partition of at least 20 GB (if you want to use Refracta Snapshot) for ExLight and a SWAP space double the size of your computer’s RAM. I.e. if you have RAM of 1024 MB or less. If you have RAM of 2 GB or more it’s enough with a SWAP space of 2 GB. The installation program in ExLight /Ubuntu is otherwise “intuitive”. Choose Expert Installation and select the partition you created in advance for installation. You’ll find the installation program under Menu >> System >> Refracta Installer. The installation to hard drive is now so simple that a 10 year old child can do it. NOTE 1: You should format your intended installation partition in advance. You can use GParted for that. NOTE 2: If you want to install Grub as bootloader while installing ExLight on a UEFI-enabled computer you’ll have to replace grub-pc with grub-efi-amd64. Just run the command sudo apt-get update followed by sudo apt-get install grub-efi-amd64 before you start the install program Refracta Installer. NOTE 3: When the installation is ready (in about 5 min) you must mount your installation partition and edit /boot/grub/grub.cfg. Change ro to rw on the kernel line. Example: sudo mkdir /mnt/sda5 followed by sudo mount /dev/sda5 /mnt/sda5. Watch this screenshot.
USB installation
Read my INSTRUCTION.
Create new users
Run the command sudo adduser NewUser.
Sound
Use Alsamixer (command: alsamixer) for sound settings. It can look like this. Also: Unmute with the round sound button in the bottom panel.
How do I install and remove programs?
ExLight/Ubuntu/Debian uses Apt/Synaptic. The most important commands are apt-get update and apt-get install program-name. You can read about package management with Apt HERE. Apt/Synaptic works extremely well. You can also install programs in ExLight from source using the commands 1) ./configure –prefix=/usr 2) make 3) make install.
VirtualBox and VMware
ExLight runs very well in VirtualBox and VMware. Maybe you’ll have to use boot alternative 3 (nomodeset).
Printing using Cups
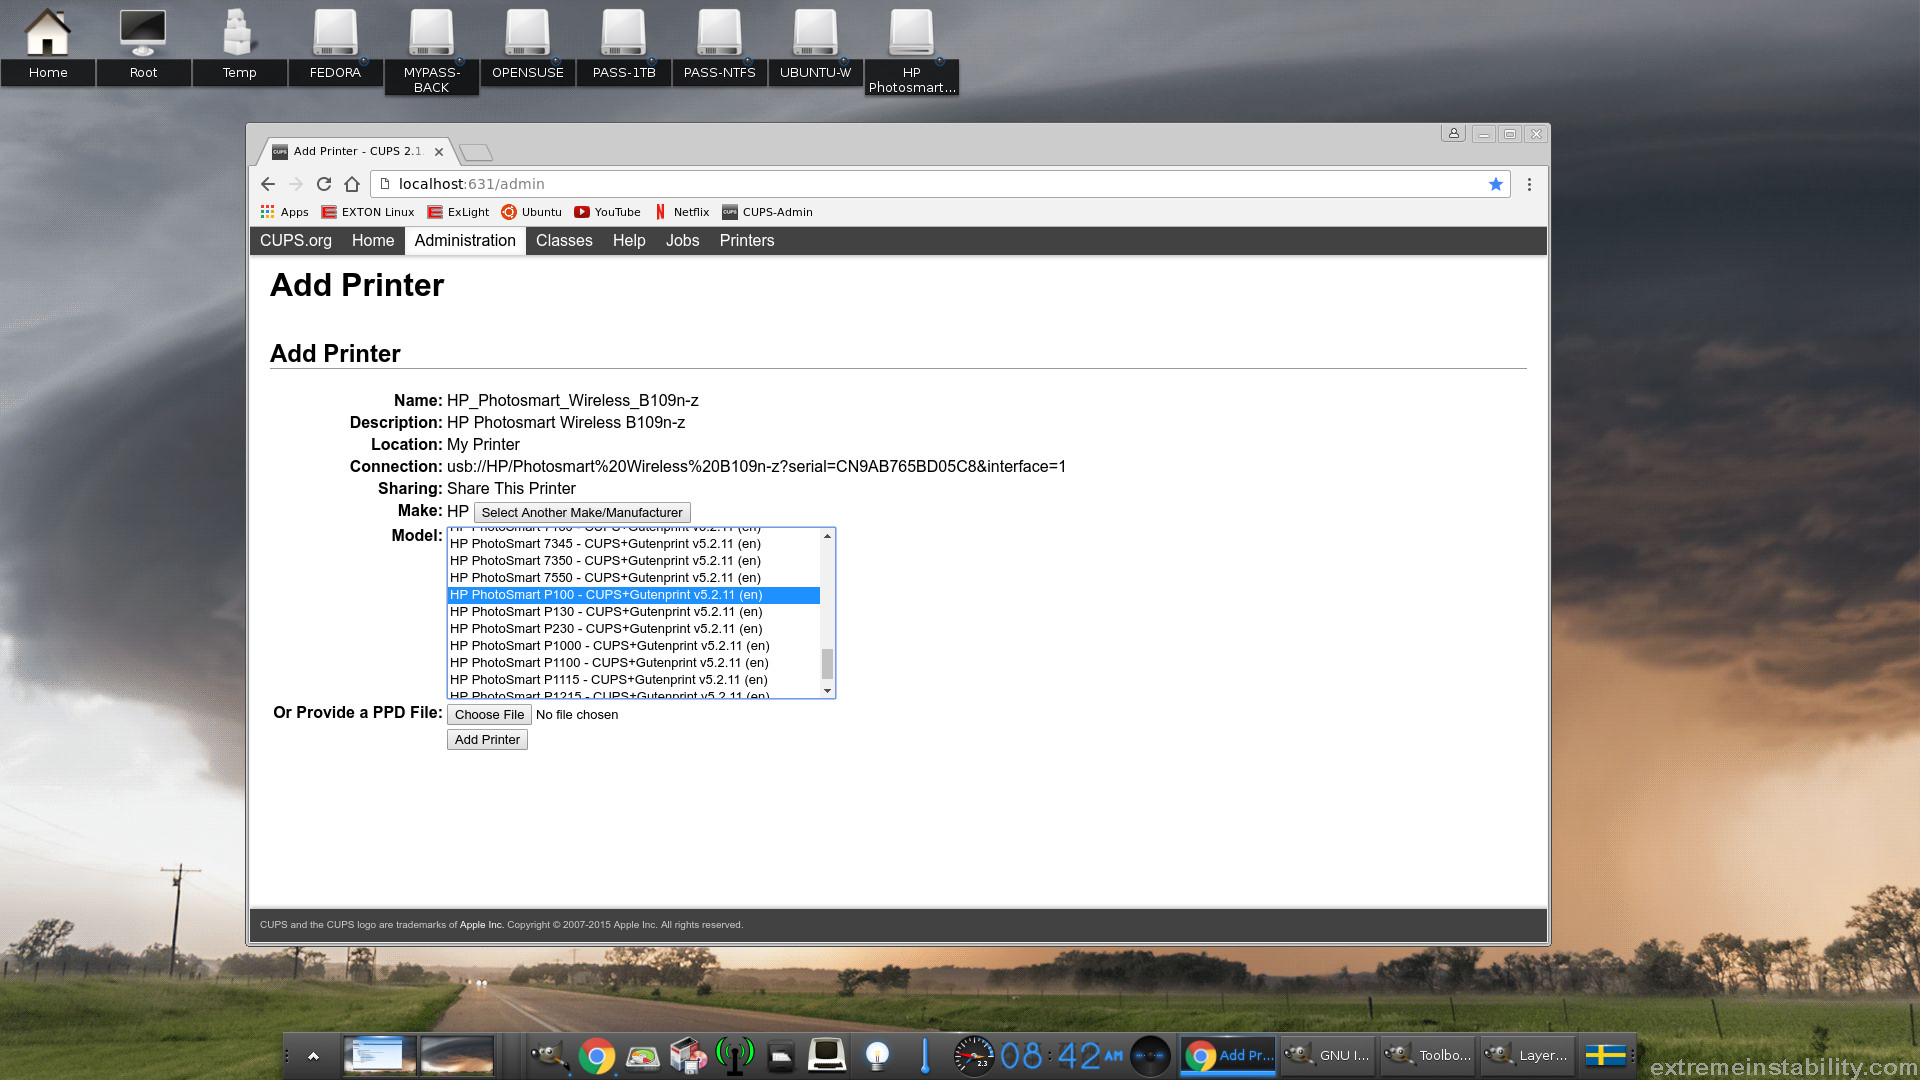
It’s really very simple to install a printer in ExLight/Ubuntu. Cups (Common UNIX Printing System) is pre-installed in ExLight Build 170105. Just open up Google Chrome and go to http://localhost:631/admin. See a screenshot when I have added my HP Printer in ExLight.
How to change Enlightenment themes
If you want to change the standard Enlightenment 0.20 theme to for example a theme called blingbling you can very easy install it in Exlight after a hard drive installation of Exlight or even while running ExLight live (from DVD or USB). Watch this screenshot. NOTE: In ExLight Build 170105 the blingbling theme is already used.
Spotify
You may want to install Spotify in ExLight. Just go ahead. It’s very easy. Follow this instruction for Ubuntu. When running ExLight Build 170105 live or from hard drive you can just install Spotify with the command sudo apt update followed by sudo apt install spotify-client.
Some cool things to do in ExLight Linux…
Screenshots
ExLight – running Refracta Snapshot
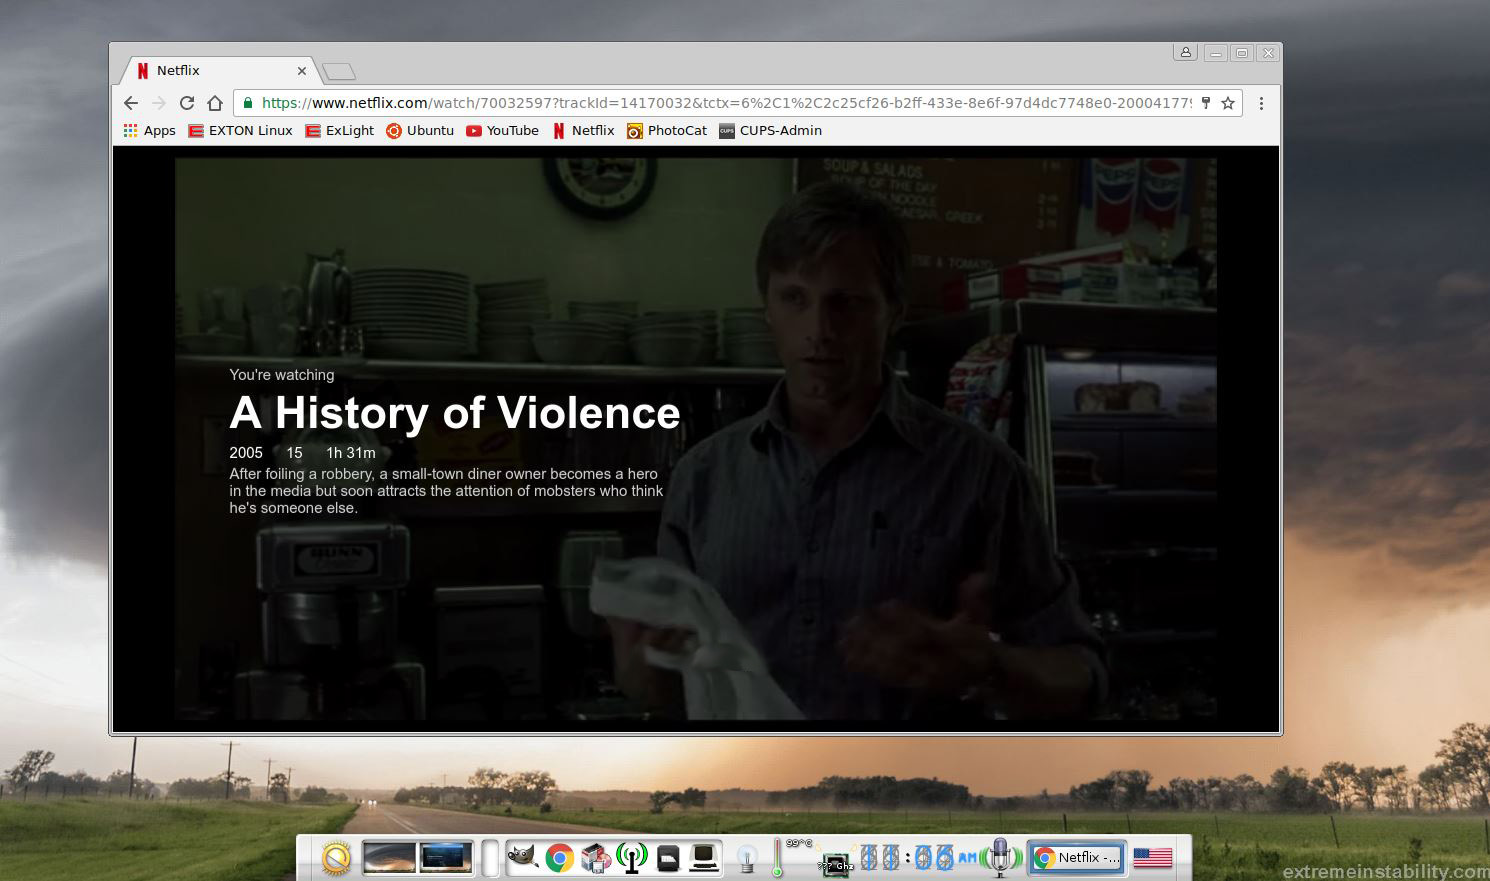
ExLight running Google Chrome with Netflix
ExLight running Spotify
ExLight running Samba
ExLight running in VMware
![]() DOWNLOAD
DOWNLOAD
This version has been replaced by version 171112
|
|